


The old school Polaroid cameras are feeling the love again. I’ve wanted one for a while now, but realistically speaking, I can’t think of a time where it would be more convenient to have that on me instead of my DSLR or even my phone. Sure, they look vintage and bring nostalgic feelings and challenge you to take a good picture without the ease of settings and Photoshop, but who wants to spend the vintage price of $100+ when you already have a perfectly good camera that more than likely cost you way more than that?
This post started because I wanted to hang pictures around my bedroom wall. I love the look of a personal photo framed in that classic Polaroid border hanging across a room. It draws back so many memories of the hows, whens, and whys of that picture and gives a peek into the life of the person living there. I am obsessed with my room. It’s very very minimal where furniture is concerned, but I love it that way. I don’t want a picture perfect home. I want it to look lived in, which is something I’ve never mastered in previous apartments. My new polaroid wall added that “homey” touch. I knew exactly what pictures I wanted to hang on my wall, so I opted for this DIY version of the polaroid because the pictures were already taken.
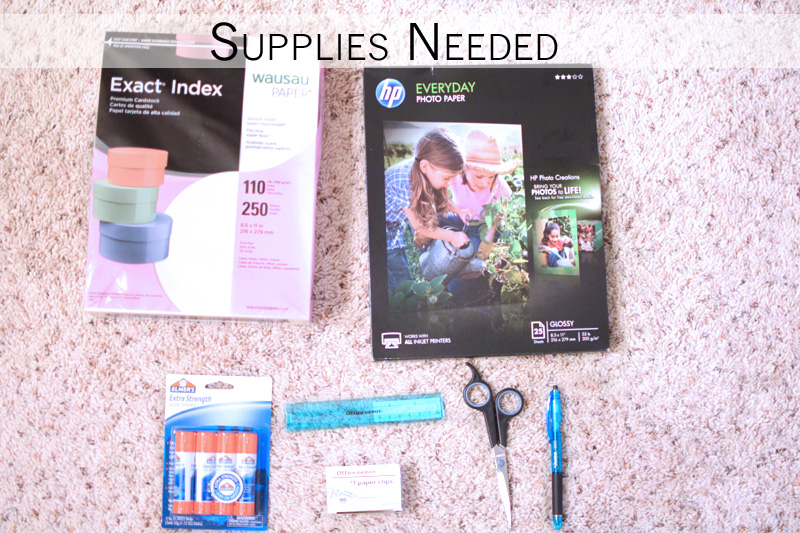
Here’s what you’ll need:
- Color Printer
- Photo Paper (trust me, regular printer paper does not capture the quality)
- Cardstock (optional; you can also just use the photo paper as the Polaroid border)
- Ruler
- Glue Stick or Double-Sided Tape
- Scissors
- Pencil and Sharpie
- Paperclips & String (option A: if you want to string the photos across your wall)
- Thumbtacks (option B: if you want to simply thumbtack the photos on your wall
Here’s how to do it:
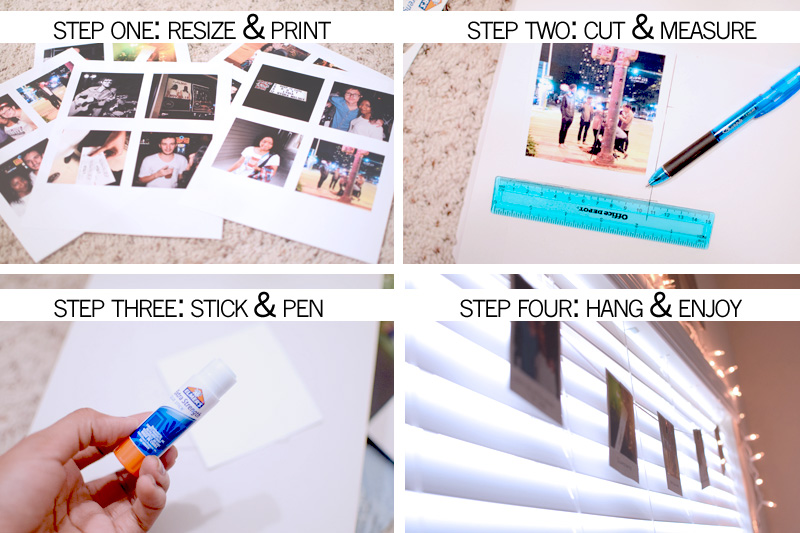
Step One – Resize & Print
After choosing your pictures and moving them from your camera or phone to your computer, use a photo editing program (I used Photoshop) to resize your images. The standard Polaroid is approximately 3×3.25 inches.
Step Two – Cut & Measure
If you want the white photo paper to be your Polaroid frame, measure around the picture to create the frame. If you don’t want the polaroid to be stark white, cut out the picture and place it on cardstock like I did. Then measure around to create the Frame. For reference, I measure 3/4″ down from the bottom of the picture, and 1/2 a centimeter around for the remaining three edges. Use your first one as a template to cut the remaining frames so you don’t have to continuously measure. If they aren’t all symmetrical, don’t sweat it. It adds character.
Step Three – Stick & Pen
Now that all your frames and pictures are cut out, it’s time to stick them together. I used a glue stick to place each photo on top of the individual frames, but tape will work as well. If you opted to keep the pictures on the photo paper, this step is skipped. Just add a little caption to the wider frame and you’re all set.
Step Four – Hang & Enjoy
Thumbtack some string long enough to reach each end of the window or wall of your choice, and paperclip the pictures to that string. It will start to dip as you add more, so be sure to have enough slack in the string that it will still cover the width to your desire. I had a lot of photos left, so I just tacked them to the wall instead of hanging another strand.
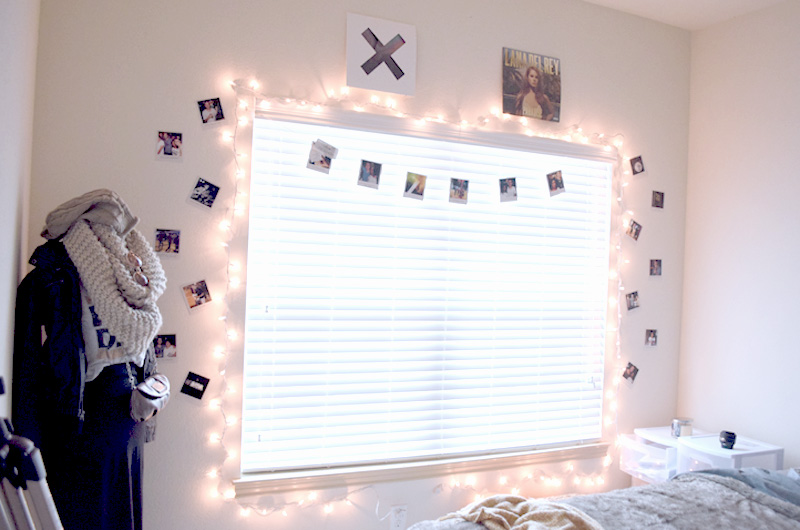
I’m really pleased with how the wall came out. It brings back amazing memories of meeting my favorite band and spending quality time with friends in one of the best cities around.


Comments +