**If you’re reading this, I’m assuming you’ve already completed step one of organizing your closet. If not, go back and read the first part of this series and then come back here for your next task..**

Welcome to the thick of it. This section, which I have deemed ‘during the cleaning’, will undoubtedly be the longest and most tiresome part of organizing your closet. Now, there’s good news and bad news. I’ve already hit you with the bad news: this is the portion you really have to remind yourself of the end goal in order to keep moving and not quit. The good news is, you have this guide here to help!
During the Cleaning
I’ve completed this process a few different ways in my day, but the steps I’m about to provide with you are what I believe to be the most efficient method. This is my humble opinion, of course, so by all means add some input or suggestions if you have any additional tips or tricks! The goal of this step is to get as much done in the most time efficient manner, because as I’ve mentioned twice now, this is the bulk of the project. Ready? Grab some snacks from part one and let’s get started!
Empty Your Closet…Completely
This was an addition through trial and error. Overall, I find organizing to be more complete if you empty out your closet. And when I say empty, I mean EMPTY. Pretend as if your closet is a new living space that came with the hangers. I do not recommend removing the hangers from the closet, as it saves time to keep them ready and waiting. This avoids having to detangle a pile of assorted hangers each time you have an article of clothing to store.
- Take all clothing off the hangers
- Remove any additional items (i.e. books, shoes, bags, etc.)
Now when I say to remove additional items, I mean carefully move them to a different location in the same manner in which you found them (if they are already organized and you don’t plan on updating them). For example, my handbags were already sorted how I wanted them to be. Rather than tossing them in a pile, I carefully lined them up on the floor the same way they were lined up in my closet. On the other hand, my books were in a tote bag, so those weren’t carefully placed to the side since I was going to organize them in a different way.
Clean it Up
Another trial and error addition, wiping down shelves and vacuuming or sweeping the closet floor will kick off your fresh start to an organized closet. I even misted my closet with room spray. Not because it needed it, but because have you smelled the new Bath & Body Works room sprays? Heaven in a can.
Part two of the cleaning task you can choose to either do before or after hanging up your clothes. I recommend before, as you’re more likely to keep the momentum going and finish everything when you haven’t yet organized your pile of clothes, but do whichever works best for you. Part two is to simply restock your closet with the additional items that were removed during the empty step. Any books, handbags, shoes, and so on can gracefully make their way back into your closet. Look at that, you’ve already got your closet on its way to cleanville!
Sort it Out
Welcome to the bulk. The bulk of the bulk. The key to sorting is keeping your focus and not getting overwhelmed by the big picture. Yes, you’ll have one huge pile of clothes broken into smaller but still huge piles all over your floor, but just keep your eyes focused on the pile you’re actively working on. It’s the same method of cleaning your house. It sounds long and overwhelming because you have no clue where to start, but if you just start on one corner and work your way around, you’ll be done in no time.
The Yes Pile and the No Pile
Alright ladies, here is where you need to be honest. That huge pile of clothes needs to be split into two piles: the yes pile and the no pile. Now, I’ve used the yes/no/maybe method in the past, but I find that the maybe pile only aids in hoarding. Be firm and be realistic. You may love that sequin dress you bought for New Years and never got to wear because you switched your outfit last minute, but is that any reason to keep it? No. Here’s some guidance on deciding one by one if your clothing will make the cut:
The yes pile should contain:
- Things you pick up and immediately say yes to without giving it a second thought
- Things you wear on a frequent to semi-frequent basis
- Things that fit you right now
- Recent purchases you haven’t worn
- Staple pieces that are versatile like a basic tee or a LBD
The no pile should contain:
- Things that do not fit you right now (if I can get rid of some of my favorite Guess jeans from 4 years ago, so can you.)
- Anything that is ripped, permanently stained, or otherwise damaged
- Things you’ve purchased more than 6 months ago and have yet to wear
- Things that aren’t your style (you know, those things that make you wonder what you were thinking when you bought it)
Divide and Conquer
Now that the tough love part is over, it’s time to separate by type. I moved all of my no items to a large laundry bag, and you can do the same. We won’t touch that pile until part three. Out of sight, out of mind.
As for the yes pile, make it more manageable by dividing it like you would your closet. For me, all of my tops are on one rack, bottoms on another, and dresses and outerwear are on another. Separate your tops, bottoms, dress, and outerwear so they each have their own pile. Now all you have to do is move one pile to your closet and start hanging. Only move one pile at a time though! Remember to keep your focus on small areas.
One additional (optional) tip for this section:
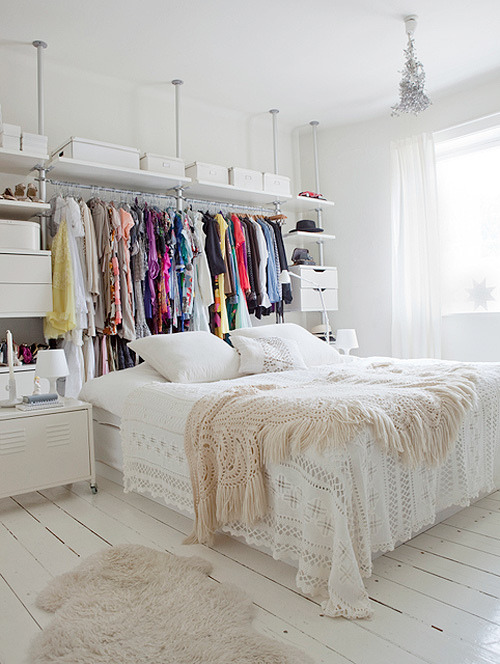
- If you’re a bit of an organization freak like me, or you’re scarred by retail life when it comes to color order like me, move color by color into your closet. For example, I started with my dresses and outerwear pile since it was the smallest. From there, I grabbed all of my black dresses and jackets and moved them to my closet. Then I hung them up next to each other. After that, I moved on to the next color within that pile and hung those. I find that color sorting as you go speeds the process up, and you won’t get tempted at the end to leave your closet in a disarray of colors mixed in with each other.
Breathe
Congratulations! You just survived the bulk of closet organizing! Don’t celebrate too hard just yet, though. We still have to deal with that laundry bag full of ‘no’ clothes, remember? Stay tuned for the third and final part of closet organizing to see what options you have for that pile!
In the meantime, share this post with your friends and breathe with satisfaction that the hard part is over.
*TIP*
Q: I want to color coordinate, but is there a certain order to use?
A: You definitely have the freedom to organize your colors in any format, but I do have a general guide that I use for those of you who need a little assistance. The color order I use when hanging clothes is as follows: White | Tan | Pink | Red | Yellow | Green | Blue | Purple Grey | Black

This article was so helpful. I am one to keep things just because of how much I paid for it! Later I realize that it is just taking up room.
-Christi
http://indiefashion.blogspot.com
Great tips!
http://fridaynightstyle.com/
These were really good tips (the first series as well).
http://www.ubetterwork.blogspot.com
Thank you!