


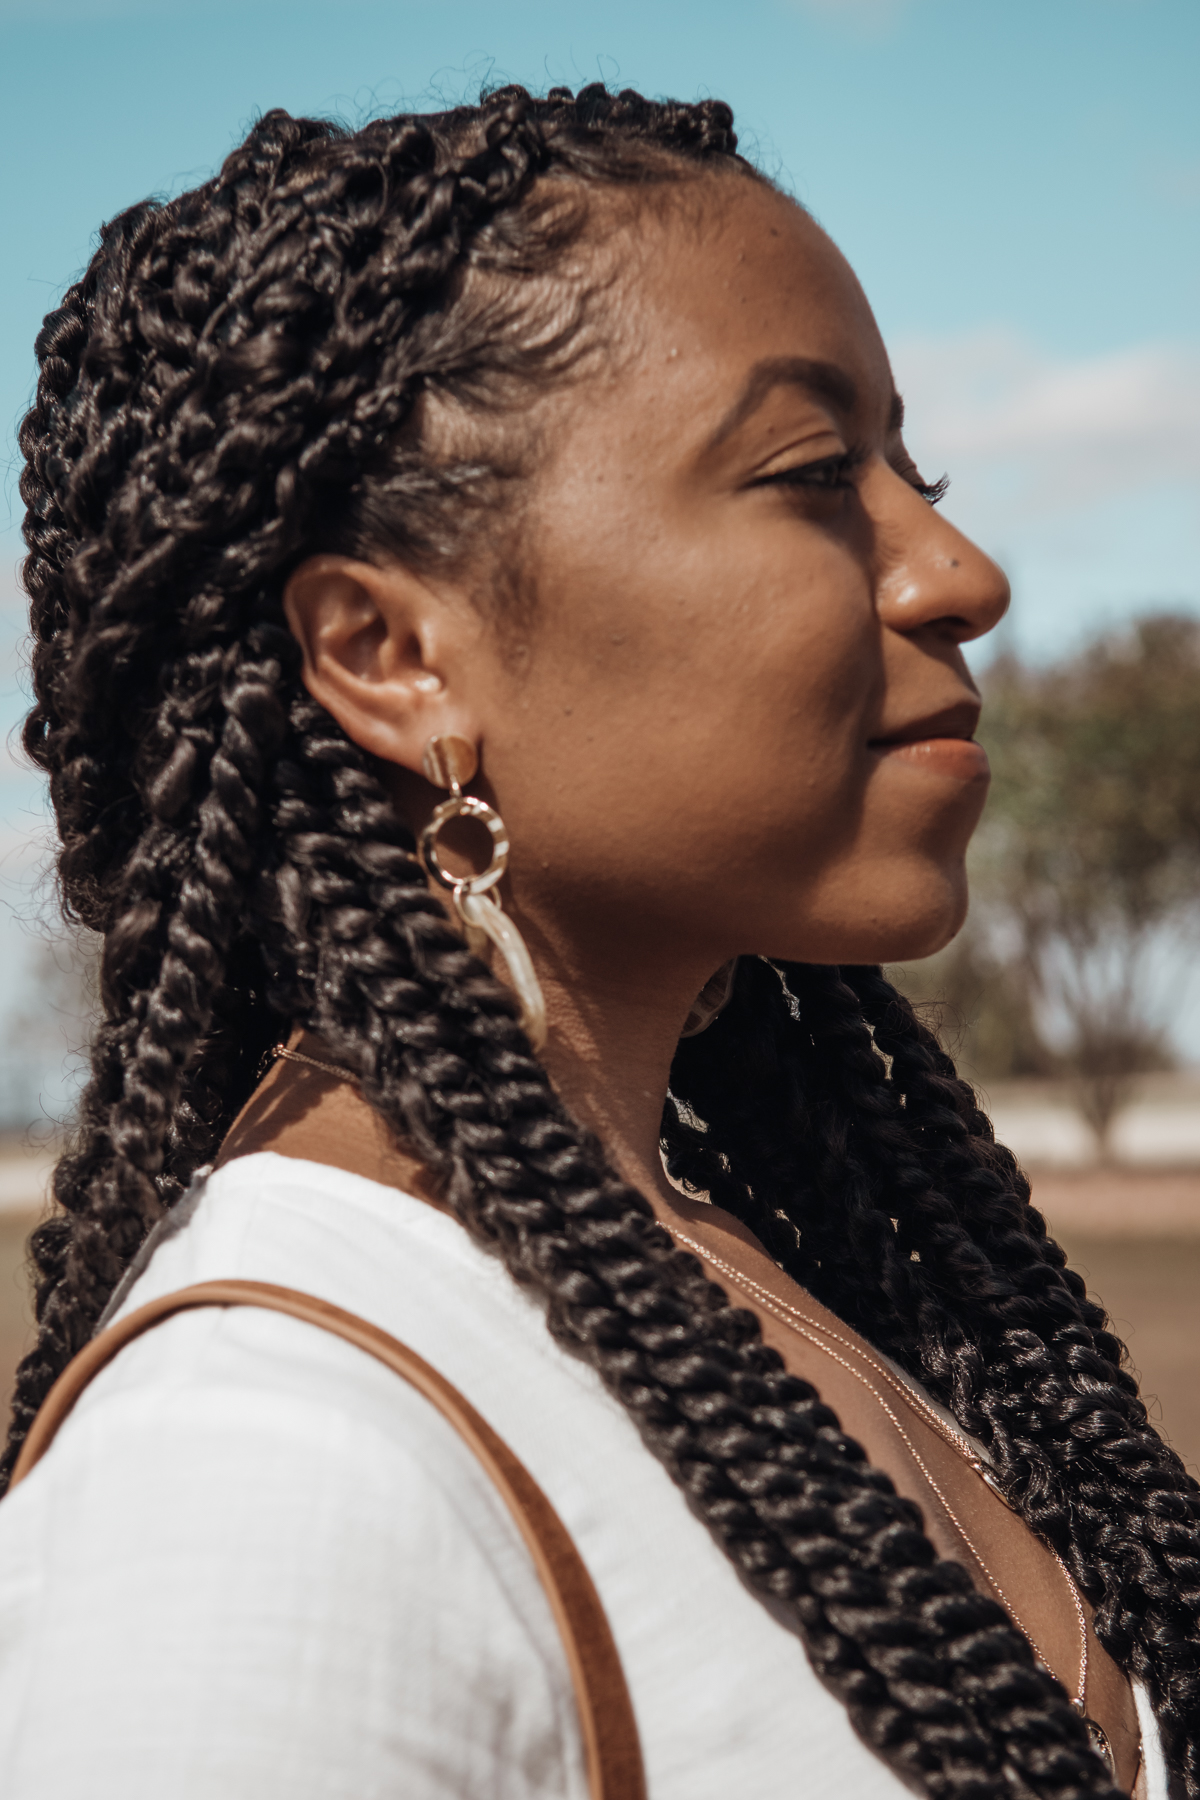
Can we talk about hair for a moment? As you may or may not know, I attempted to DIY passion twists for a festival hairstyle! When it comes to attending a music festival, one thing I learned about myself is that I like to keep my hair as low maintenance as possible. Since I was only on vacation for a few days, I decided to try my hand at passion twists instead of paying someone else to do them. As much as I’ve learned about natural haircare over the years, I’m still a total beginner with anything involving added hair, even protective styles like passion twists. But, let’s learn together! First up: passion twists. If you’re interested in trying to DIY passion twists, keep reading the post to find out what you should know beforehand!


DIY Passion Twists | 5 Tips to Know Before Getting Started
Accept the frizz.
The first thing I realized after wearing passion twists is how messy the hairstyle can get. As someone with naturally curly hair, I’ve certainly learned to embrace a bit of frizz over the years. Still, I didn’t expect for a styled hairdo like passion twists to get frizzy with each passing day. In the video I posted about my hair, I mentioned that my frizz was likely higher than average because of the products and the environment.
I used Kivani’s Edge Control on my scalp and edges, which completely helped to keep the base of my twists nice and sleek each day, but I was very lighthanded with the product throughout the rest of the twists. You should definitely expect to see frizz regardless, but you can decrease it even more by applying a decent amount of braiding lotion throughout your twists. Because I focused primarily on the roots, the rest of my hair was susceptible to frizz.
Hands off the passion twists!
This tip goes hand in hand with the frizz talk above. Even if you add more styling lotion throughout your twists, the style itself is much more fragile than braids. Twists can (and will) unravel as time goes on, but you can prolong your wear time by keeping any additional styling to a minimum. I originally wanted to style my hair in a half-up/half-down bun for one of the festival days, but luckily I changed my mind. The friction from dancing outdoors at an all-day festival caused a few twists to loosen up, so imagine how much faster they would have unraveled if I manipulated the hair each day!

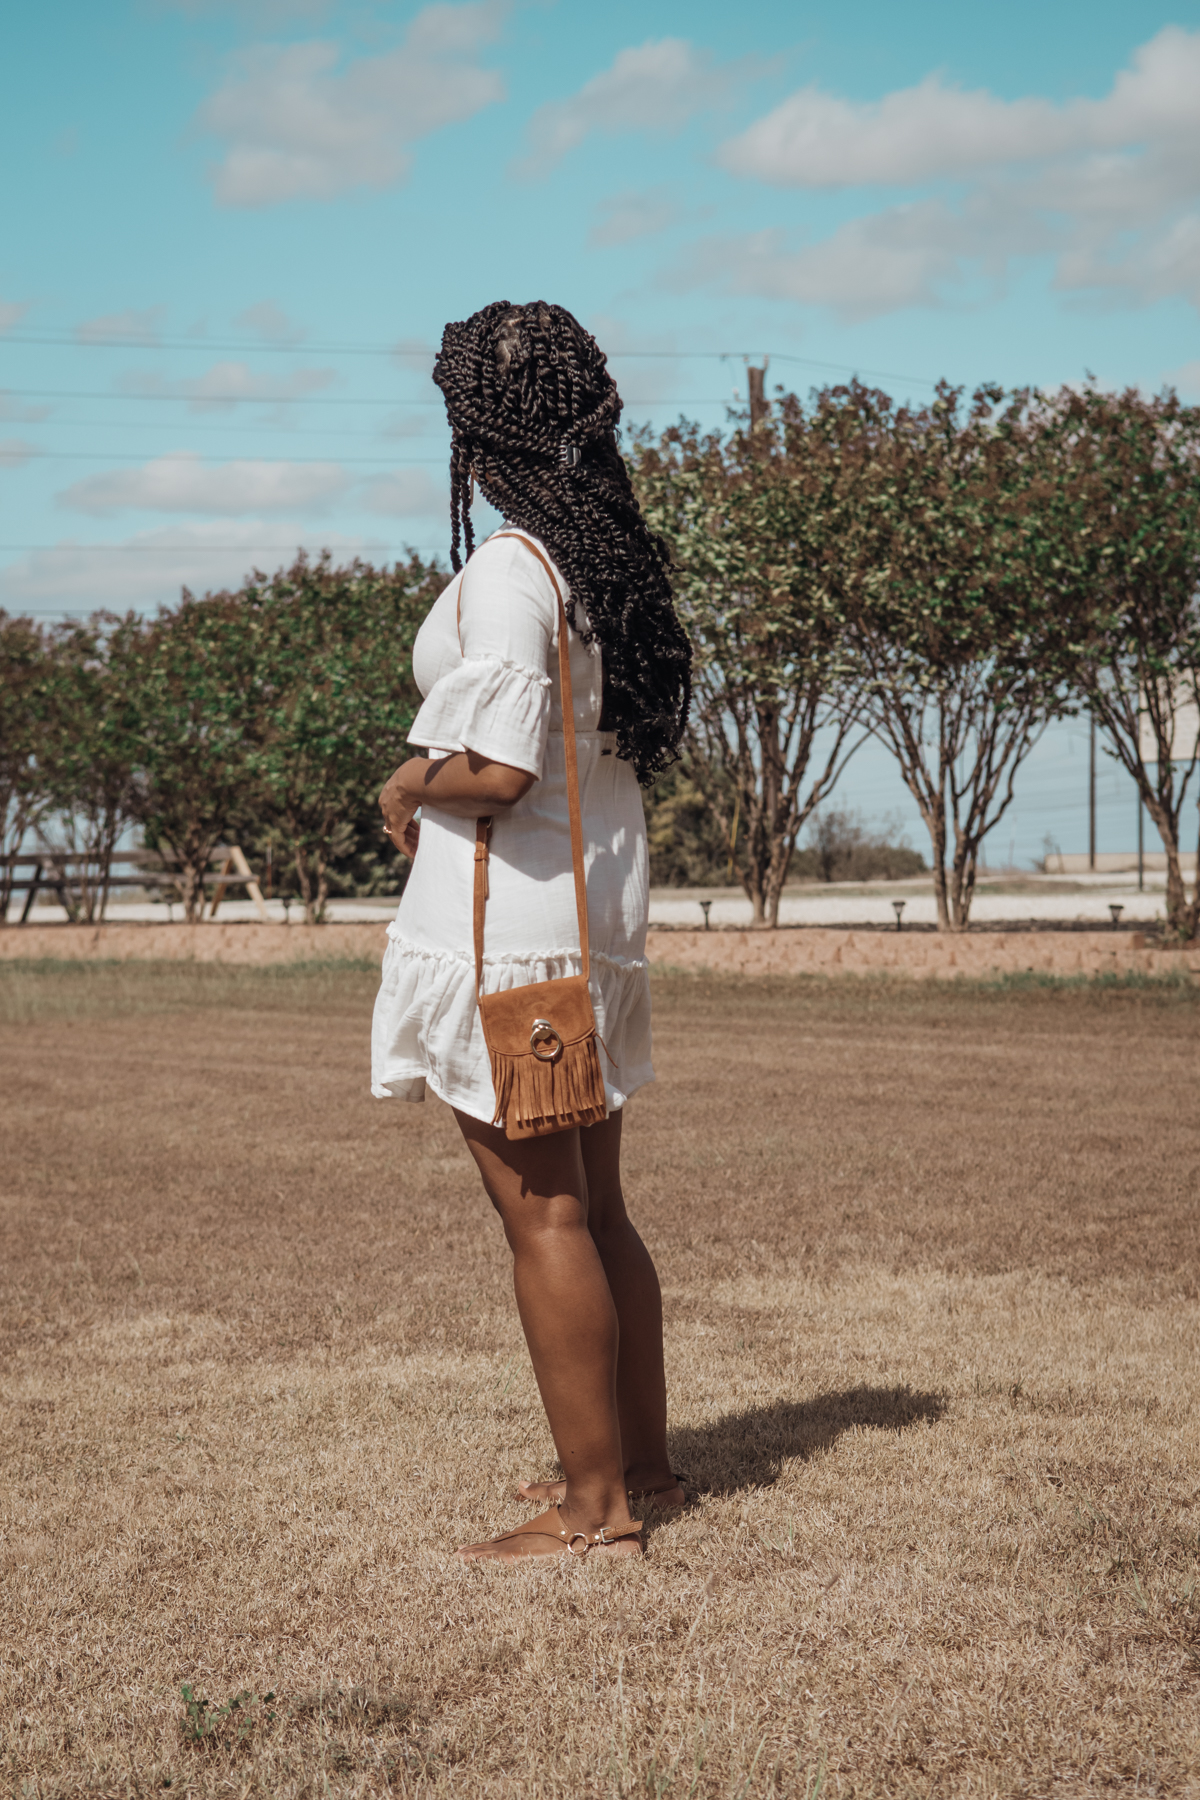
SHOP THE LOOK
Billabong Dress | Sam Edelman Sandals | Forever 21 Bag
Add cushion time to the DIY passion twist process.
To all my fellow beginners out there, this tip is especially for you! You can prepare to DIY passion twists by watching a ton of YouTube tutorials, but you’ll find the best way to learn is simply by doing. On average, the girls on YouTube estimated the style to take around 4-6 hours if I’m not mistaken. For me, it took even longer.
Shorter hair will naturally cut your time down quite a bit, but I even found that the initial part of getting started on each twist added more time than I expected. I can’t remember exactly how many hours the entire process took me to complete, but I started around mid-to-late afternoon and didn’t finish until after midnight! The twisting was extremely tedious, so enlist help on that part if you can. It will save you time and your fingers won’t get tired like mine did.
Twisting in tight, quick motions is key!
Speaking of your fingers getting tired and enlisting help, you absolutely have to twist your hair correctly the first time! While it’s tedious, it will help keep your twists together so you have minimal touchups throughout the week. Be sure to watch the video on passion twists to get a better idea of what I mean by this tip, but you need to keep your hands as close to the part that you’re actively twisting as possible.
If you’re twisting your hair right at the scalp and yet you have your hands holding on to the hair from mid-shaft or at the ends, your twists will be long and loose. This will cause them to unravel quickly and your hard work will be quickly undone. Take mini-breaks in between each twist to give your fingers a rest, but keep the motions short, tight, and quick while you’re working from root to tip on each twist.
Choose your products wisely.
In the video, I share a glimpse into my DIY passion twist products. At a minimum, you should use:
- Braiding lotion or some type of hair moisturizer
- Edge control
- Leave-in conditioner
- Hair serum
Adding the proper amount of products to your hair before and during the DIY passion twists process will keep your hair moisturized and help the style hold up for a longer amount of time. Prior to adding the hair, you should moisturize your own hair with a good leave-in conditioner. I used Pattern Beauty’s leave-in conditioner after washing and blow-drying my hair using the same brand’s shampoo and conditioner.
Once my hair was dry, I also added a blend of hair serum and hair lotion for some extra moisture. I used Pattern Beauty’s Jojoba Hair Serum and ORS Hair Lotion. My personal favorite hair lotion is Mielle’s Avocado Hair Milk, but I was out of town at the time and forgot to pack it. Remember, I highly suggest adding hair lotion after your hair is blow-dried and while you’re adding the twisting hair as well. I only did the first part and I think my twists would have been less frizzy if I also moisturized the extra hair throughout the process.
Finally, my biggest lifesaver for this hairstyle was a quality edge control. Kivani’s Edge Control is my favorite one to use when I need a strong hold edge control, and it certainly kept my roots laid each day. Even with the bottom half of my twists unraveling or becoming a little frizzy due to lack of product, my roots didn’t require much touchup.
As for the hair itself, I purchased my synthetic hair from Amazon. The exact package I ordered came with a crochet hook as well, so I used the hook method instead of the rubber band method to complete the process.
RECAP: What to Know Before DIY’ing Passion Twists
- Passion twists will get messy.
- Keep the styling to a minimum.
- Leave yourself plenty of time to complete the twists.
- Twist the hair in tight, quick motions.
- Use the right hair products.
Overall, I definitely think passion twist hairstyles are super flattering and worth the time spent to do them. I loved the outcome of my DIY passion twists and feel like I did a pretty decent job for my first attempt. While I wouldn’t pay to get them done, I would love to wear this style for my next extended vacation. They were much easier to take out than box braids, and I didn’t feel like the twists caused any sort of tension on my scalp.
Have you tried passion twists before?
FTC: This post contains affiliate links, meaning, a small commission is received when purchases are made. Please show your support by shopping from the links provided!


Comments +